How to Clean a Security Camera Lens Without Damaging It
Why a Dirty Camera Lens Affects Your Security Footage
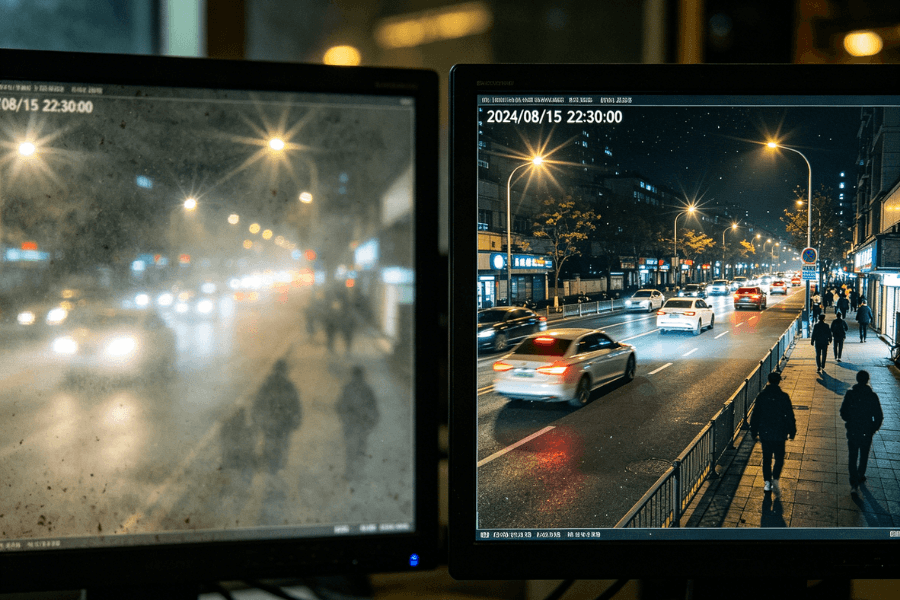
A security camera can only perform as well as its lens allows. When the lens is covered with dust, fingerprints, or moisture, image clarity drops immediately.
This affects more than visual quality. It can lead to missed details, unreliable motion detection, and reduced confidence in your monitoring system.
In real use, even a thin layer of dust can reduce sharpness, especially at night when glare becomes more visible.
How to Tell If Your Camera Lens Needs Cleaning
You do not need to guess. Most cameras show clear signs when the lens needs attention.
Look for the following:
- Blurry or hazy video
- Glare or halos around lights, especially at night
- Reduced contrast or darker areas in the image
- Frequent false motion alerts
- Visible dust, smudges, or water spots on the lens
In most homes, a quick visual check every few weeks is enough to decide whether cleaning is needed.
What Makes a Security Camera Lens Get Dirty
Lens contamination usually builds up gradually. Understanding the source helps reduce how often you need to clean it.
Common causes include:
- Airborne dust and dirt
- Fingerprints during installation or adjustment
- Moisture from humidity or condensation
- Insects, spider webs, or debris
- Grease or smoke in kitchens or enclosed spaces
Outdoor cameras are more exposed, but indoor cameras can still collect dust over time, especially in high-traffic areas.
What You Need Before Cleaning a Camera Lens
Using the right tools prevents scratches and protects the lens coating.
Recommended tools:
- Microfiber cloth – soft and non-abrasive
- Lens cleaning solution – safe for coated surfaces
- Compressed air – removes loose dust without contact
- Soft brush or blower – for edges and corners
- Cotton swabs – for small gaps on the camera body
Avoid using:
- Paper towels or tissues
- Alcohol or ammonia-based cleaners
- Rough cloth or abrasive materials
- Direct water spray
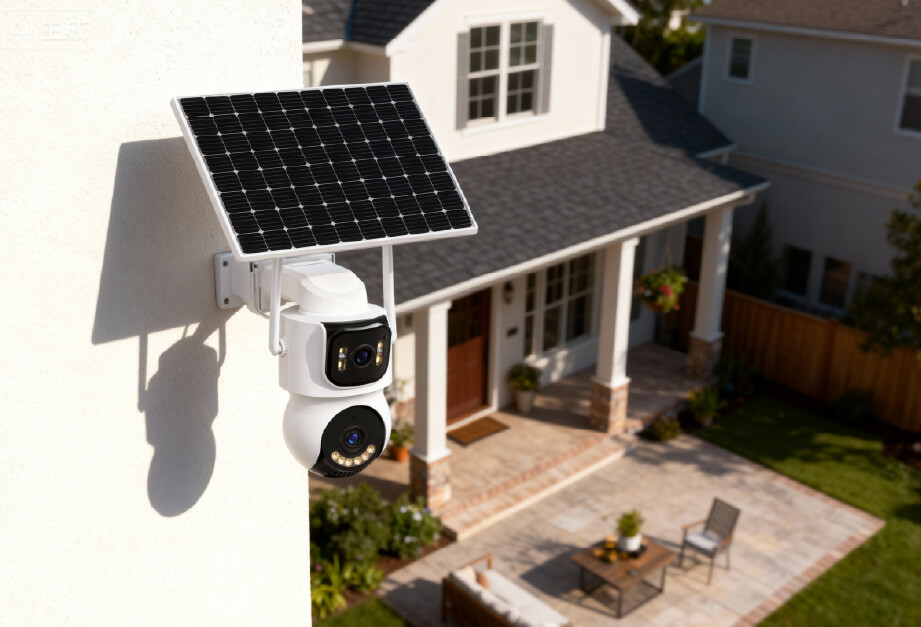
For example, if you are using a RusinVision indoor security camera with a magnetic mount, you can remove the device easily and clean it at a comfortable angle without applying pressure.

How to Clean a Security Camera Lens Step by Step
Follow these steps to clean the lens safely without risking damage.
Step 1 – Turn off the camera
Disconnect the power or disable the device through the app. This prevents electrical risk and avoids accidental recording.
If you are using a wireless indoor camera, removing the unit before cleaning usually makes the process safer and more controlled.
Step 2 – Remove loose dust
Use compressed air or a soft brush to clear dust and debris. Keep a safe distance and avoid blowing directly into the center of the lens.
Step 3 – Wipe the lens
Apply a small amount of lens cleaning solution to a microfiber cloth.
Gently wipe the lens in a circular motion, starting from the center and moving outward.
Do not apply pressure. Light contact is enough to remove most smudges.
Step 4 – Clean the camera body
Use a slightly damp microfiber cloth to clean the outer housing.
Use a cotton swab for edges, joints, or speaker openings.
Step 5 – Dry the surface
Use a clean, dry microfiber cloth to remove any remaining moisture.
Ensure no streaks or water spots remain.
Step 6 – Power on and test
Reconnect the camera and check the live view.
Confirm that the image is clear and stable.
Common Mistakes That Can Damage Your Camera Lens
Avoiding these mistakes is just as important as following the correct steps.
Do not:
- Use alcohol or household glass cleaners
- Wipe with paper towels or clothing
- Apply excessive pressure
- Blow air from your mouth onto the lens
- Touch the lens with your fingers
- Disassemble the camera to clean internal parts
- Clean outdoor cameras in harsh weather conditions
Important: Internal cleaning should always be handled by professionals.
What Happens If You Clean a Lens Incorrectly
Improper cleaning can cause permanent damage that cannot be fixed by wiping again.
Common issues include:
- Scratched lens surface from abrasive materials
- Damaged coating leading to haze or glare
- Residue buildup from improper cleaning liquids
- Moisture entering the housing, affecting internal components
In many cases, these problems reduce image quality even after cleaning. This is why using the correct tools and technique is critical.
How Often Should You Clean a Security Camera Lens
Cleaning frequency depends on the environment.
General guidelines:
- Indoor cameras – every 2 to 3 months
- Outdoor cameras – every 1 to 2 months
- Dusty or humid areas – clean more frequently
- Visible dirt or smudges – clean immediately
In practice, checking the camera feed regularly is the simplest way to decide when cleaning is needed.
Do Indoor and Outdoor Cameras Need Different Cleaning?
Indoor and outdoor cameras face different conditions, which affects how you maintain them.
Indoor cameras:
- Less exposure to weather
- More likely to collect dust or fingerprints
- Require less frequent cleaning
Outdoor cameras:
- Exposed to rain, wind, and sunlight
- More prone to water spots, dirt, and insects
- Require more frequent inspection and cleaning
Adjust your cleaning routine based on where the camera is installed.
How Camera Placement Affects How Often You Need to Clean
Where you install the camera directly impacts how quickly the lens gets dirty.
Avoid placing cameras:
- Near air vents or fans
- Facing direct sunlight or strong glare
- Close to kitchens or smoke sources
- Near humidifiers or water sources
Proper placement reduces buildup and maintenance effort.
For example, indoor cameras placed in stable environments, such as living rooms or bedrooms, tend to stay cleaner longer. A suitable option is to use a compact indoor camera designed for flexible placement, which helps avoid exposure to dust-heavy areas.
Keeping Your Camera Lens Clear Over Time
Cleaning a security camera lens is a simple task that directly affects performance. Clear lenses support accurate monitoring, stable motion detection, and reliable video quality.
Using the right tools and following a careful process helps prevent damage and extends the life of the device. Combined with proper placement and regular checks, this routine keeps your system working as expected.
For example, RusinVision indoor security cameras are designed for easy handling and routine maintenance. With proper placement and periodic cleaning, they can maintain consistent image clarity without frequent intervention.
FAQ
How often should I clean a security camera lens?
Most indoor cameras should be cleaned every two to three months. Outdoor cameras may require monthly cleaning due to exposure to dust, rain, and insects. In practice, a quick visual check is the best guide. If you notice smudges, glare, or reduced clarity, clean the lens immediately to maintain consistent performance.
Can I use glass cleaner or Windex on a camera lens?
No. Glass cleaners such as Windex often contain ammonia or alcohol, which can damage the protective coating on the lens. This may lead to haze or permanent image distortion. Use a lens-specific cleaning solution and a microfiber cloth instead to safely remove dirt without affecting image quality.
What is the best way to clean a security camera lens?
The safest method is to first remove loose dust using compressed air or a soft brush. Then wipe the lens gently with a microfiber cloth and a small amount of lens cleaning solution. Always apply the liquid to the cloth, not the lens. Finish by drying the surface with a clean cloth.
How do I fix a foggy or cloudy camera lens?
Start by wiping the lens with a dry microfiber cloth to remove surface moisture. If fog remains, use gentle airflow, such as a cool hair dryer, to help evaporation. Persistent fog inside the lens usually indicates a sealing issue and should be handled by the manufacturer or a qualified technician.
Why is my camera still blurry after cleaning?
If the image remains blurry, the issue may not be surface dirt. Check for internal condensation, scratches, or improper cleaning technique. In some cases, focus settings or hardware limitations may be the cause. Reviewing the live feed after cleaning helps confirm whether the problem is resolved.