Smart Security Camera Mounting Ideas for Homes and Apartments
Poor Camera Placement Causes Most Security Gaps
Many homes already have security cameras, yet critical moments are still missed. In most cases, the problem is not the camera itself, but where and how it is mounted.
Incorrect placement often leads to blind spots, poor angles, or unusable footage. Cameras placed too low are also more likely to be tampered with and may fail to capture clear facial details.
A practical mounting strategy ensures that each camera captures useful, actionable footage rather than just recording activity.
What to Check Before Installing Your Security Cameras
Before choosing specific mounting ideas, define what needs to be monitored and how the space is used.
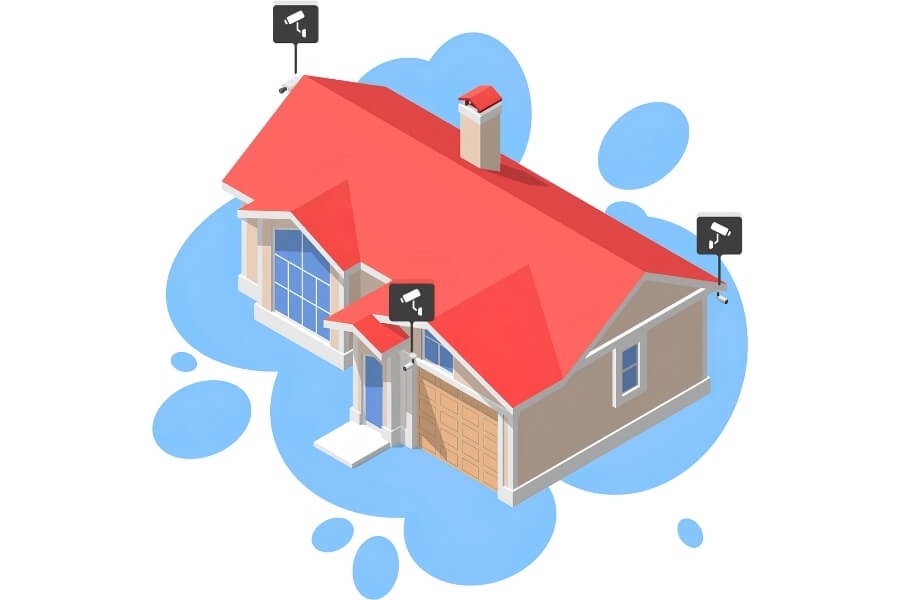
Identify Key Monitoring Areas
Focus on areas where activity is most likely to occur:
- Entry points such as front and back doors
- Ground-level windows
- Hallways and movement paths
- Living rooms and shared spaces
- Garage, driveway, or balcony access
These locations provide the highest value for security coverage.
Understand Your Installation Environment
Installation decisions depend on real conditions:
- Indoor areas require discreet placement and stable coverage
- Outdoor areas require protection from weather and sunlight
- Lighting conditions affect both daytime and night performance
- Wi-Fi signal strength impacts reliability for wireless cameras
Before mounting, check signal strength using your phone at the intended camera position.
Choose a Camera That Matches the Setup
Camera selection should follow installation needs, not the other way around.
For example, if flexibility and minimal installation are important, a wireless indoor camera allows repositioning without tools. A suitable option is a RusinVision HomeVision series camera, which supports plug-and-play setup and works well in apartments or shared spaces.
How to Choose the Right Camera Position and Mounting Method
Use this step-by-step approach to avoid common setup issues.
- Define the monitoring goal
Decide whether you need entry monitoring, full-room coverage, or motion tracking - Select the installation zone
Identify where activity happens most frequently - Choose a mounting method
Wall, ceiling, corner, or no-drill depending on the surface - Set the correct height and angle
Mount between 8 and 10 feet, then tilt slightly downward - Test the live view before final fixing
Check whether faces are visible and adjust angle if needed
A camera should always be tested in live view mode before final installation. Small angle changes can significantly improve results.
Where Most People Install Cameras Incorrectly
Many installation issues come from common mistakes rather than hardware limitations.
- Cameras placed too high may miss facial details
- Cameras placed too low are easier to tamper with
- Cameras facing windows may suffer from glare
- Overlapping coverage wastes camera capacity
- Ignoring corner areas creates blind spots
A simple rule is to review each camera’s field of view on a phone screen and confirm that key areas are clearly visible.
Best Indoor Security Camera Mounting Ideas for Real Homes
Front Door and Entry
Mount the camera above the door at around 9 to 10 feet. Angle it downward so both the doorway and approach path are visible in one frame.
To verify placement, stand at the door and check if your face is clearly captured in the live view.
Smart mounting tip
Avoid placing cameras directly at eye level. A slightly elevated position improves coverage and reduces interference.
If you are using a camera with two-way audio, you can communicate with visitors without opening the door, which adds a layer of safety.
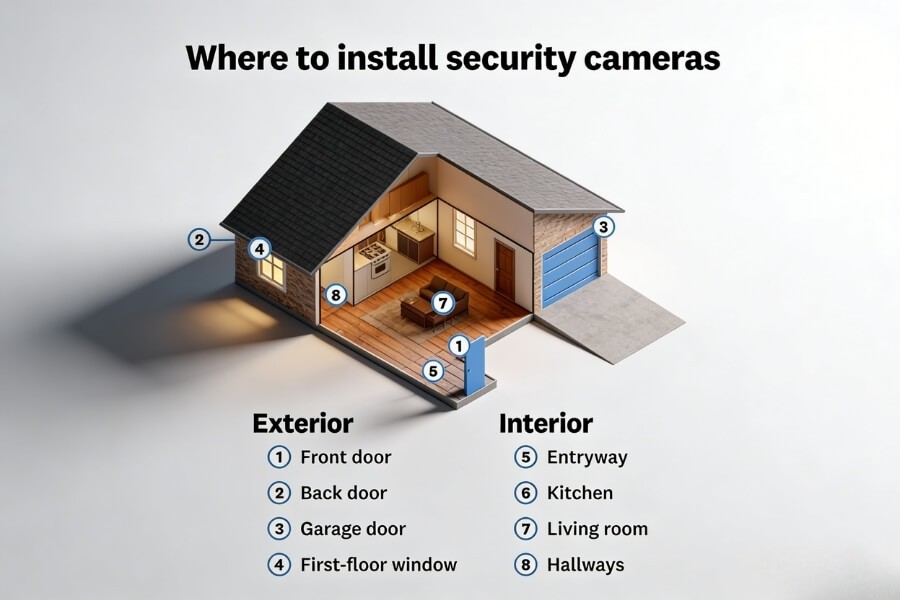
Living Room and Common Areas
Install cameras in upper corners, on shelves, or near ceiling lines to cover the entire space.
Use wide-angle or pan-tilt cameras to reduce the number of devices needed.
Smart mounting tip
Test the camera view during both day and night. Screens, windows, and reflective surfaces can affect image quality.
For flexible monitoring, a camera that supports remote angle adjustment can help adapt to changing daily activities.
Hallways and Staircases
Mount cameras along movement paths to track transitions between rooms.
Wall or ceiling mounting works best in narrow spaces.
Smart mounting tip
Position cameras at intersections or stair landings where movement naturally converges. This increases the chance of capturing meaningful footage.
In low-light areas, night vision performance becomes critical. Cameras with infrared or full-color night modes provide more consistent results.
Baby Room and Elder Care
Place cameras at a distance that allows full-room visibility without creating discomfort.
Avoid placing cameras too close to beds or resting areas.
Smart mounting tip
Check whether movement across the room is fully visible without needing to zoom. A wider field of view is often more useful than a close-up angle.
In care scenarios, alert features can improve response time when unusual activity is detected.
Rental and Apartment Solutions
Avoid permanent installations that damage walls.
Use flexible mounting options:
- Magnetic mounts
- Adhesive brackets
- Clamp-style mounts
Smart mounting tip
After installation, gently test stability by adjusting the camera angle. If the mount shifts, reposition it before use.
For example, lightweight cameras with magnetic bases can be repositioned easily, making them suitable for temporary setups.
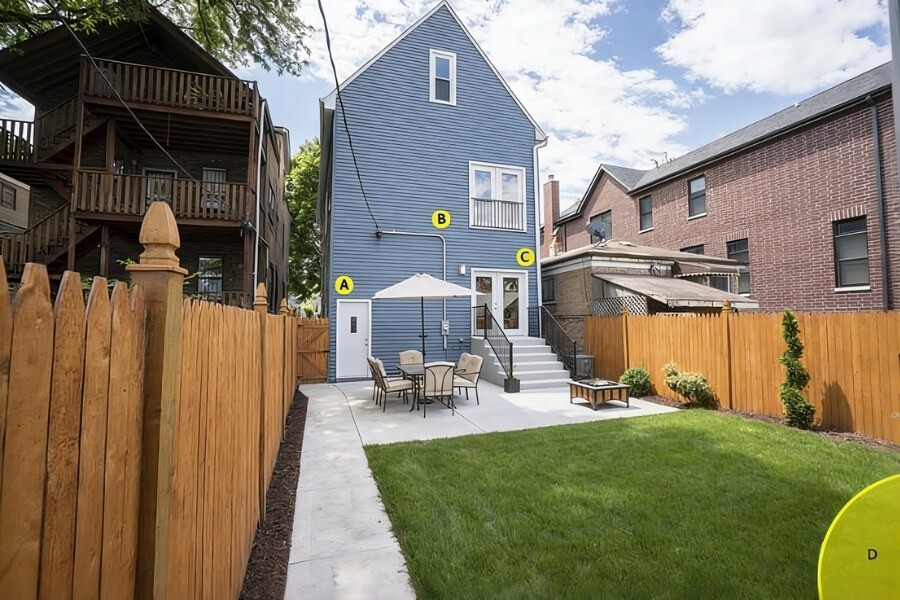
Where to Mount Cameras Around Your Home Entrance and Outdoor Areas
For users who need partial outdoor coverage, focus on entry-adjacent areas.
- Install cameras under roof eaves for weather protection
- Place cameras above doors, balconies, or gates
- Use elevated angles to monitor driveways and access paths
Avoid direct sunlight exposure, which can reduce image clarity.
For short-term outdoor use, wireless cameras can be paired with protective housings. For long-term setups, dedicated outdoor cameras are recommended.
Wall, Ceiling, or No-Drill – Which Mounting Method Works Best
Common Mounting Options
- Wall mounting for entry points and hallways
- Ceiling mounting for wide coverage
- Corner mounting for discreet positioning
- No-drill mounting for rental or temporary use
How to Select the Right Mount
- Choose metal mounts for durability
- Confirm load capacity matches the camera
- For outdoor use, select weather-resistant materials
Managing Cables and Power
- Use cable routing or conduits for wired setups
- Keep cables hidden to prevent tampering
Wireless setups simplify installation and reduce visible wiring. For example, RusinVision HomeVision cameras are designed to reduce installation complexity in home environments.
Common Camera Mounting Mistakes That Reduce Security
- Installing cameras without testing live view
- Ignoring lighting conditions at night
- Mounting cameras at incorrect angles
- Placing cameras where Wi-Fi signal is weak
- Forgetting to recheck positioning after installation
Always test the final setup from a user perspective, not just from the installation point.
How to Improve Camera Coverage After Installation
Once installed, refine your setup based on real usage.
- Review recordings to identify blind spots
- Adjust angles if key areas are not clearly visible
- Reposition cameras if furniture or layout changes
- Clean lenses regularly to maintain image clarity
Cameras that support mobile access allow quick adjustments and monitoring without physical changes.
FAQ
What are the best places to install home security cameras?
Install cameras at key entry points such as front and back doors, as well as hallways and shared living areas. These locations capture the most relevant movement and help reduce blind spots. Focus on areas where people naturally pass through rather than isolated or rarely used spaces.
How high should a security camera be mounted?
Mount most cameras between 8 and 10 feet above the ground. This height allows clear facial capture while reducing the risk of tampering. After installation, check the live view to confirm faces are visible and adjust the angle slightly downward if needed.
Can I install a security camera without drilling?
Yes. Many cameras support non-invasive mounting options such as magnetic bases, adhesive pads, or clamp brackets. These solutions are suitable for rental properties or temporary setups. Always test the stability of the mount before final use to ensure the camera remains securely positioned.
Do wireless security cameras work reliably?
Wireless cameras perform reliably when connected to a stable Wi-Fi network. For best results, install cameras within strong signal range and avoid interference from thick walls or metal surfaces. Dual-band or 2.4 GHz support can improve connection stability in typical home environments.
How can I protect privacy when using indoor cameras?
Place cameras in shared areas such as living rooms or hallways and avoid private spaces like bedrooms or bathrooms. Use features such as privacy zones or scheduled recording to limit unnecessary monitoring. Clearly define what the camera should and should not capture before installation.
Do I need night vision for indoor cameras?
Night vision is important for maintaining visibility in low-light conditions. Cameras with infrared or full-color night modes can capture clearer details after dark. Test the camera at night to ensure key areas remain visible and adjust placement if lighting conditions affect image quality.
Build a Reliable Home Security Setup with the Right Mounting Strategy
Effective security camera installation depends on placement, mounting method, and proper adjustment.
By focusing on real usage scenarios, testing camera views, and refining placement over time, you can create a system that consistently captures useful footage.
For most home environments, flexible and easy-to-install cameras provide a practical starting point. RusinVision solutions are designed to support this approach, allowing users to set up and adjust their systems without unnecessary complexity.